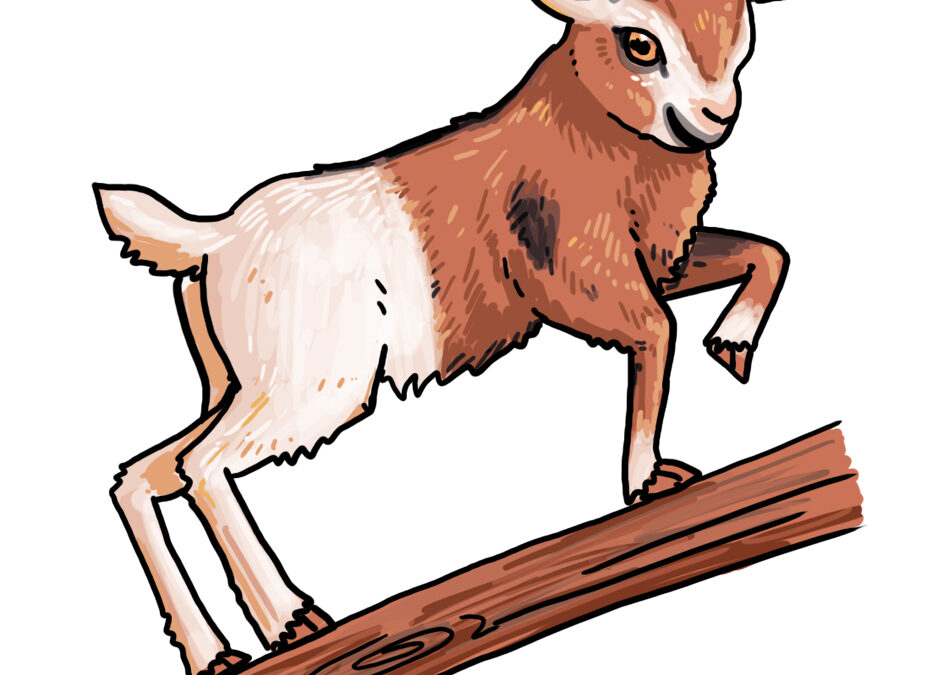
How to Draw a Kid (Baby Goat) – Easy Step-by-Step Drawing Tutorial for Beginners
Learning how to draw a kid (baby goat) is a fun and beginner-friendly project for young artists, animal lovers, and anyone who wants to practice simple shapes. In this easy step-by-step tutorial, we’ll break the drawing down into basic circles, lines, and details—perfect for kids, classrooms, and homeschool activities.
Baby goats are playful, curious, and full of personality, which makes them wonderful drawing subjects. By following these clear instructions, you’ll learn how to create a cute and lively kid goat standing on a wooden beam. Let’s get started!
🐐 Step-by-Step: How to Draw a Kid (Baby Goat)
Step 1: Sketch the Basic Shapes
Start with three simple ovals—one for the head and two for the body. Place the head oval slightly above the body and tilt it gently to give your goat a lively pose.
Step 2: Connect the Shapes
Add curved lines to connect the body parts. These lines will form the back and torso. Sketch a small circle for the snout and mark where the legs will go. Our kid is climbing, so the feet line goes up to the right. Add small ovals for the hooves.
Step 3: Add the Ears and Face
Draw two triangle-shaped ears pointing outward. Add a small dot for the eye and outline the muzzle. Begin shaping neck by drawing some from the head to the front body. Some circles inbetween torso and feet mark the knees.
Step 4: Build the Legs
Use simple straight and curved lines to form the legs. Baby goats have thin, delicate legs, so keep them narrow.
Step 5: Add the Tail and Horn Bumps
Sketch a tiny fluffy tail and add small bumps on top of the head where the horns will grow. Begin refining the leg shape and add gentle curves for connecting the joints.
Step 6: Outline the Final Details
Draw the final outline over your sketch. Add fur texture, hooves, and the wooden plank under the goat’s feet. Erase any construction lines.
Step 7: Add Color
Color your kid goat with soft brown, white, or gray tones. Baby goats often have adorable patches and markings—feel free to get creative!

🎨 Creative Ideas for Using This Baby Goat Tutorial
Here are some fun ways kids, teachers, and parents can use this drawing tutorial:
✔ Classroom Art Projects: Use this tutorial during a farm-animals art lesson or a springtime classroom activity.
✔ Farm-Themed Worksheets: Create printable coloring pages or step-by-step worksheets for early learners.
✔ Easter or Spring Crafts: Pair your finished drawing with handmade cards, paper cutouts, or farm-themed decorations.
✔ Homeschool Nature Lessons: Combine art + science by drawing the goat and learning about how goats live on a farm.
✔ Bullet Journal or Sketchbook Practice: Use the simple shapes method to practice proportion, curves, and line confidence.
✔ Kids’ Activity Packs: Add this baby goat tutorial to your your own printable activity bundles or drawing kits.